
Best Nail Art Tools for Beginners | 2026 Starter Kit Guide
Written by Emma ·
Have you ever looked at someone’s stunning nail art and thought, “I could never do that”? Spoiler: you absolutely can and you don’t need a salon to pull it off.
Nail art is one of the biggest beauty trends right now, and thousands of girls are learning to create gorgeous designs right at home. From minimalist dots to detailed floral patterns, your nails can be your next creative canvas.
But here’s the truth: without the right nail art tools, even the simplest designs can feel frustrating. The good news? You don’t need to spend a fortune. This guide will walk you through every essential tool you need to get started even if you’ve never picked up a nail brush before.
What Are Nail Art Tools?
Nail art tools are small, specially designed instruments that help you create patterns, designs, and details on your nails. Think of them like art supplies but for your fingertips.
For beginners, these tools are a game-changer. Without them, you’re basically trying to paint a detailed picture with a mop. With the right tools, even someone who’s “bad at art” can create clean, professional-looking nail designs.
Why do tools matter? Precision. Regular nail polish brushes are designed to coat the nail not draw on it. Nail art tools give you control over every tiny detail, line, and dot.
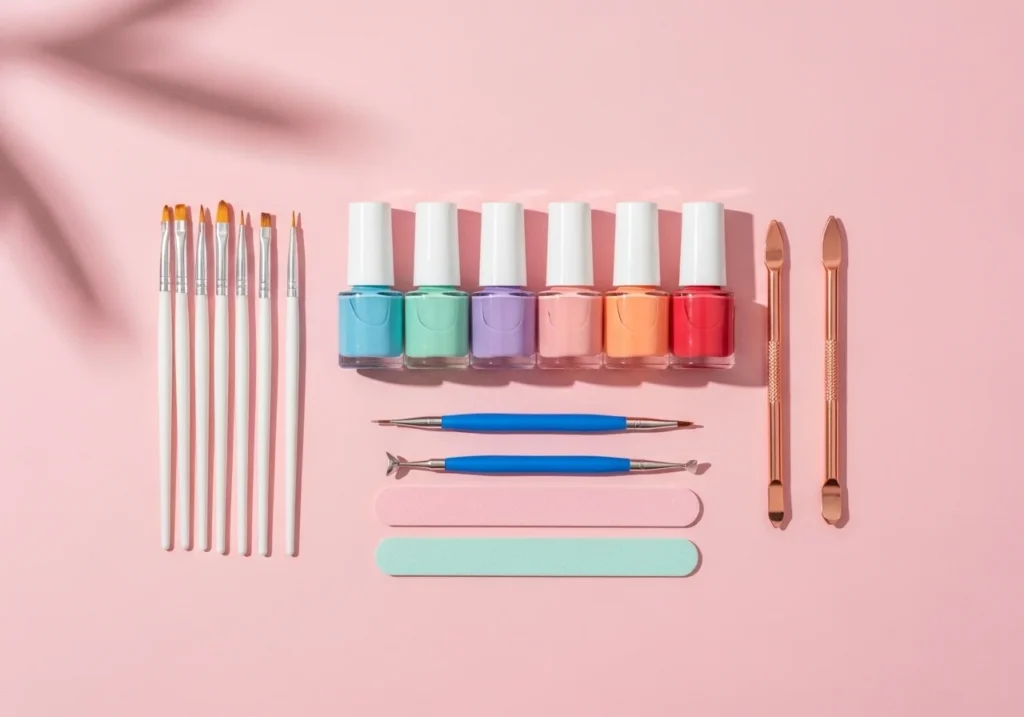
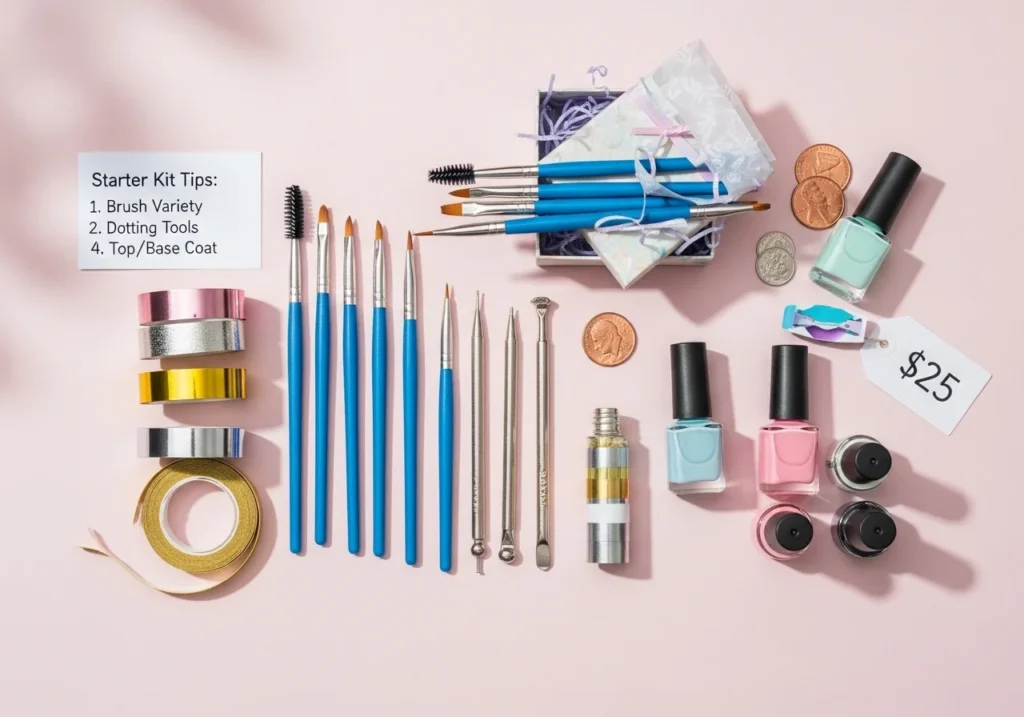
Essential Nail Art Tools List for Beginners
Here’s a simple nail art tools list for beginners. These are the basics that every beginner should have before starting:
- Nail Art Brushes: The most important tool in your kit. Different brush shapes create different effects from fine lines to broad strokes.
- Dotting Tools: Double-ended metal tools perfect for creating dots, flowers, and swirls. Available in multiple sizes.
- Nail Files & Buffers: Shape your nails before you start. A smooth nail surface makes your art look 10x better.
- Nail Polish (Multiple Colors): Stock up on a few base colors and some accent shades. Pastel, neon, and neutral tones are great for beginners.
- Base Coat: Always apply this first. It protects your nails and helps polish stick longer.
- Top Coat: Seal your design with a top coat to prevent chipping and add a glossy (or matte!) finish.
- Nail Polish Remover + Cleanup Brush: Mistakes happen and that’s totally fine. A thin brush dipped in remover fixes errors instantly.
Start with these basics before investing in anything more advanced. This nail art supplies for beginners list covers everything you’ll need for your first few designs.
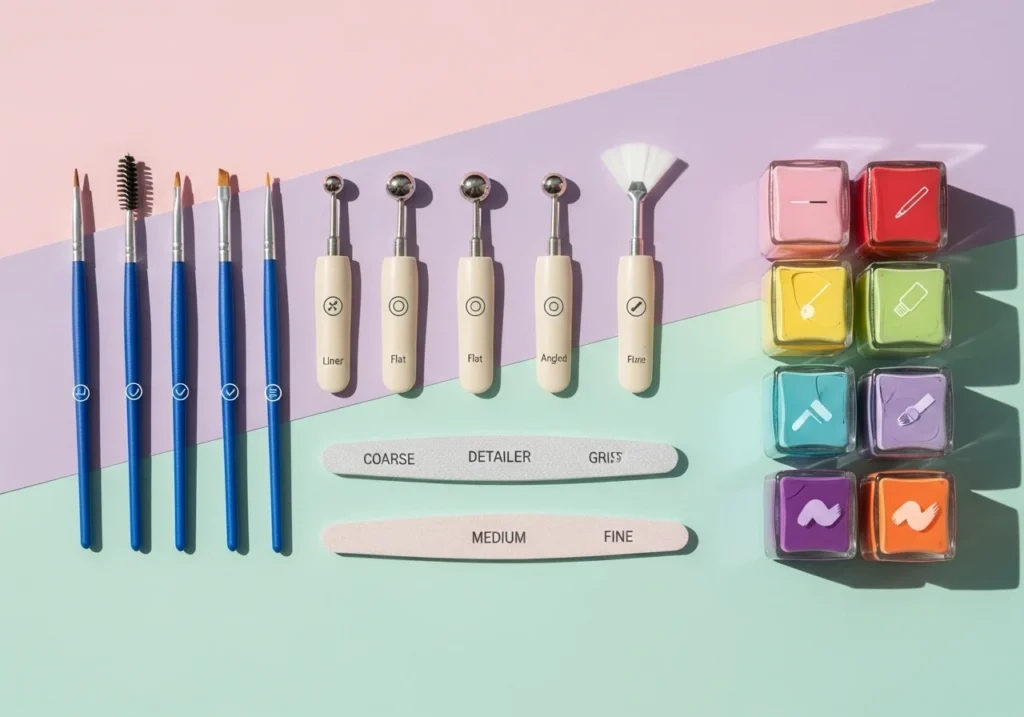
Best Nail Art Brushes for Beginners
If there’s one thing worth investing in, it’s quality nail art brushes. The best nail art brushes for beginners are thin, flexible, and easy to control. Here’s a breakdown of the different types:

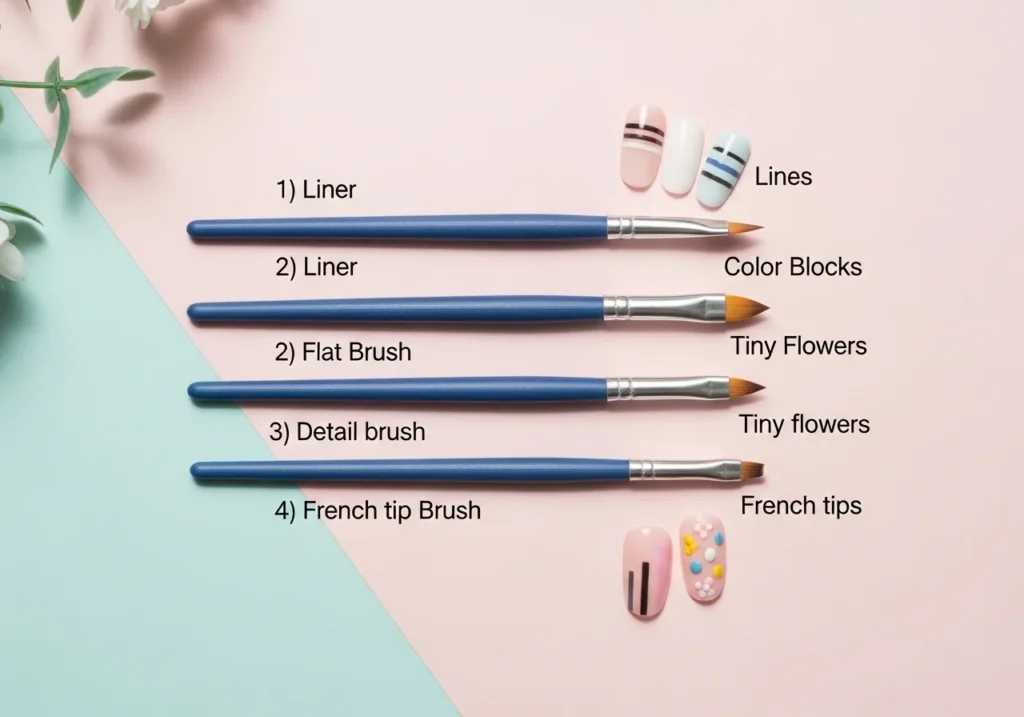
1. Nail Art Liner Brush
This is a super-thin brush with long bristles perfect for drawing straight lines, swirls, and delicate patterns. The nail art liner brush is your go-to for any design that requires fine, precise strokes.
Best for: Stripes, swirls, geometric designs, and outlines.
2. Flat Brush
A flat, wide brush that’s great for filling in large areas quickly. You can also use the edge to create clean lines or ombre blends.
Best for: Color blocking, French tip base, and flooding the nail with color.
3. Detail Brush
Shorter and firmer than a liner brush, the detail brush gives you precise control for tiny designs, letters, or intricate patterns.
Best for: Tiny flowers, writing, small details, and corrections.
4. Nail Art Brush for French Tips
This is a specialized brush with an angled or flat tip that follows the curve of your nail perfectly. If a clean French manicure is your goal, the nail art brush for french tips is a must-have. It creates that crisp white smile line without smudging.
Best for: Classic French tips, reverse French, and colored tip designs.
💡 Pro tip: When shopping for the best nail art brushes, look for brushes with synthetic bristles. They hold their shape better and are easier to clean than natural-hair brushes.
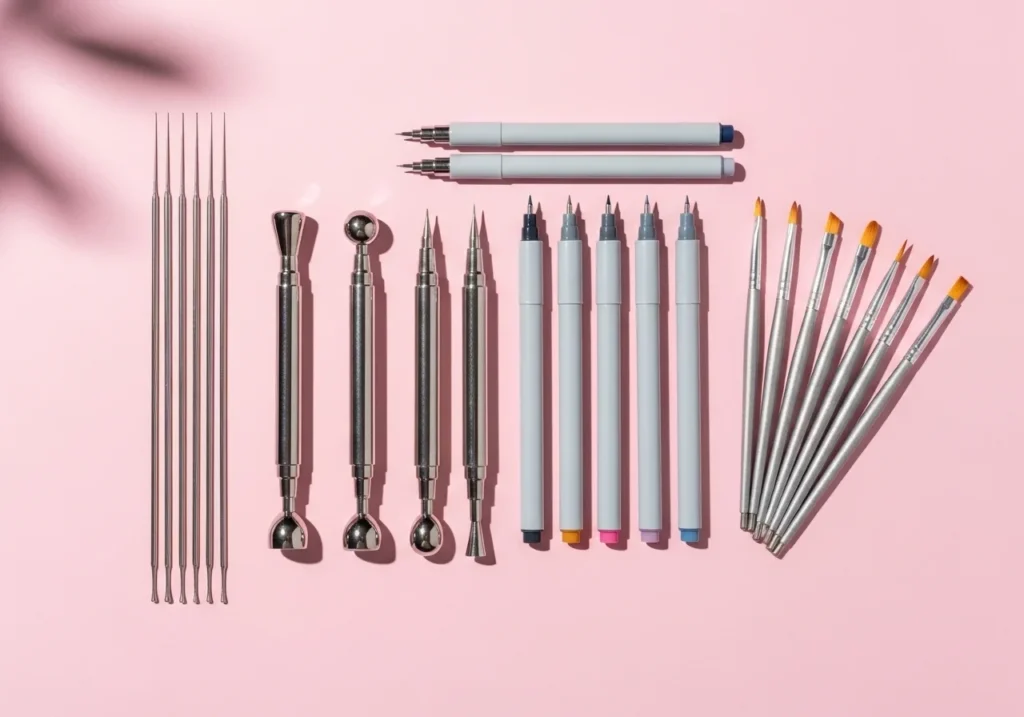
Nail Art Dotting Tools Guide
Nail art dotting tools are tiny, double-ended metal sticks with a ball tip on each end. They come in a set of different sizes from pin-small to larger, bolder dots.
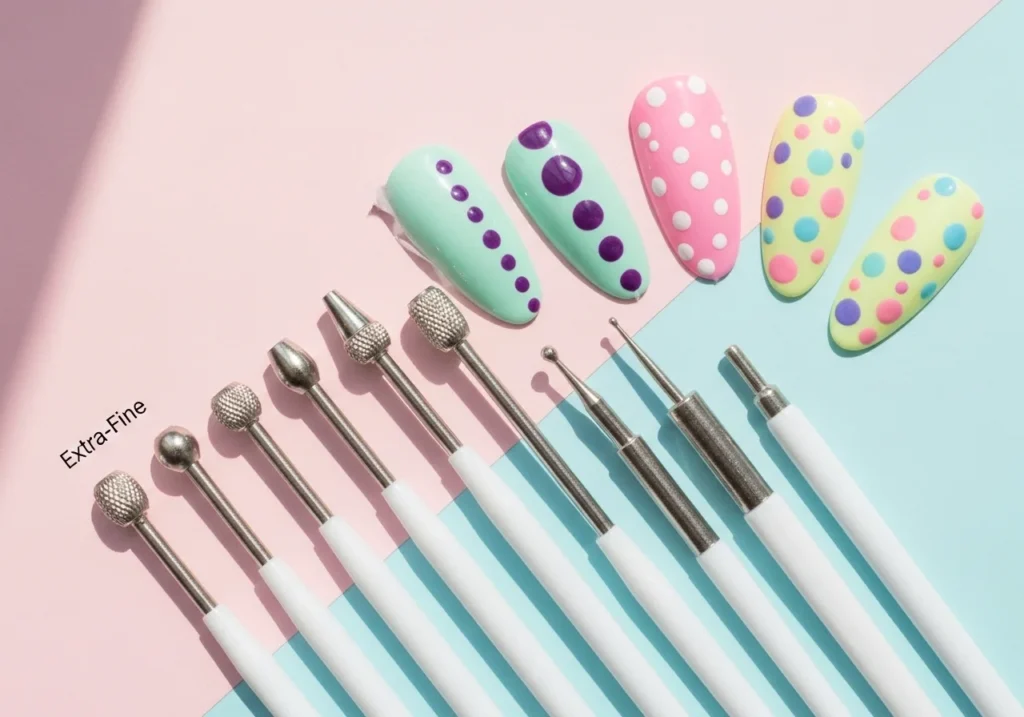
Small dotting tools: Create tiny accent dots, perfect for polka dot patterns or flower centers.
Medium dotting tools: Great for making uniform polka dots or simple flower petals.
Large dotting tools: Create bold, statement dots or use for bubble nail art trends.
Dotting tools are the easiest nail art tools to use even for total beginners. Here are two simple designs to try first:
- Polka Dots Apply your base color, let it dry, then dip a medium dotting tool into a contrasting polish and press firmly onto the nail.
- Simple Flowers Use a medium tool to create 5 dots in a circle, then use a small tool to add a contrasting center dot. That’s it instant flower!
Dotting tool sets are affordable and widely available. They’re a great first addition to any nail art kit.
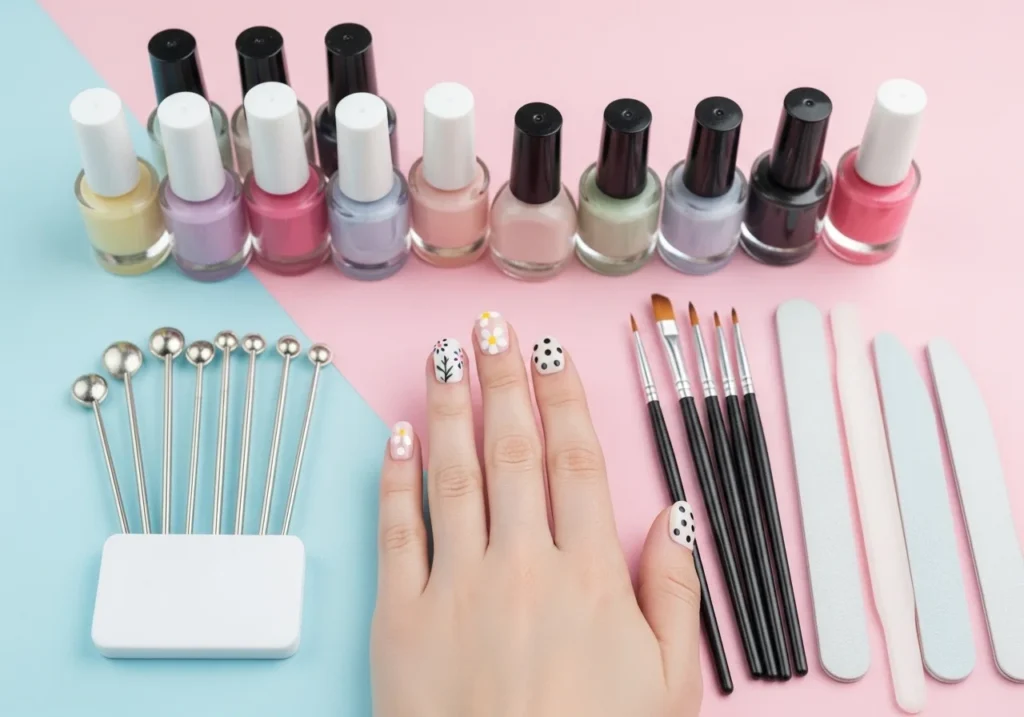
Must-Have Nail Art Accessories
Once you’ve got the basic tools, these nail art accessories will take your designs to the next level — without adding much cost.
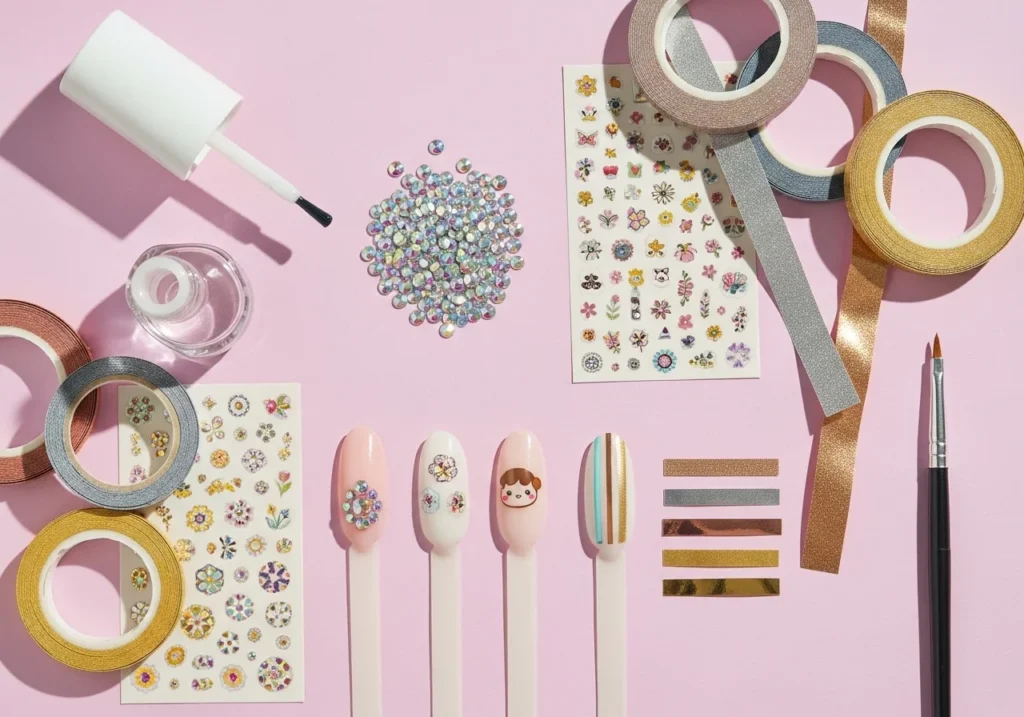
- Rhinestones & Gems: These tiny sparkly gems add instant glamour to any design. Apply them with a dotting tool or tweezers while your top coat is still wet.
- Nail Stickers & Decals: Pre-made designs you simply press onto the nail. Perfect for days when you want cute art without the effort. Flowers, stars, and abstract prints are super popular right now.
- Striping Tape: Thin metallic or matte tape used to create clean geometric lines, stripes, and borders. Easy to use and totally beginner-friendly.
- Nail Foils: Holographic or metallic foils that transfer onto nails for a mirror-like or galaxy effect. Absolutely stunning with minimal effort.
- Stamping Plates & Scraper: A fun tool where you pick up a pre-engraved design with a stamper and press it directly onto your nail. Great for repeating patterns.
You don’t need all of these at once. Start with rhinestones and striping tape — they’re the most beginner-friendly nail art accessories.
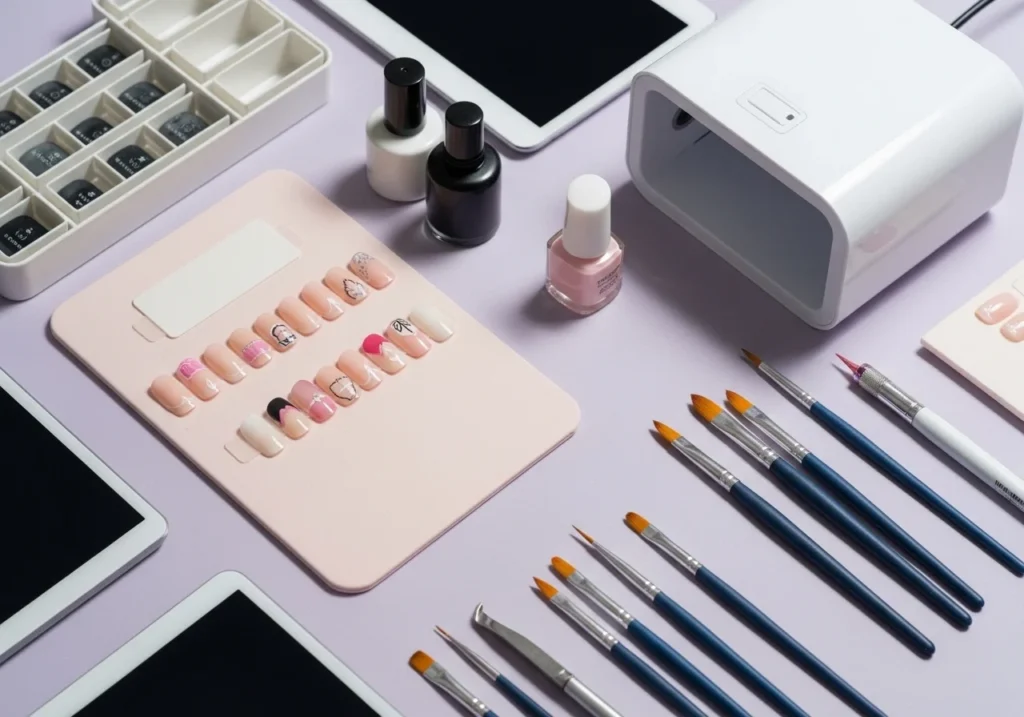
Nail Art Kits: Are They Worth It?
Short answer: Yes especially if you’re just getting started.
A nail art kit or nail art set bundles multiple tools together at a much lower price than buying everything separately. Most beginner kits include brushes, dotting tools, striping tape, and sometimes even rhinestones or nail polish.
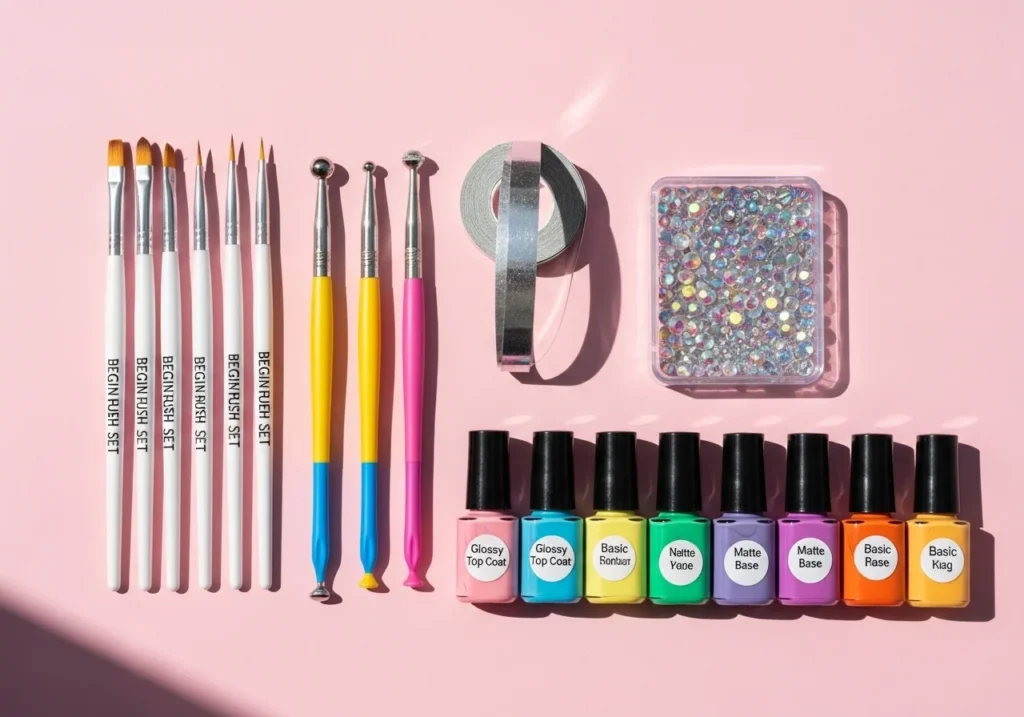
Who Should Buy a Nail Art Kit?
- Complete beginners: who don’t know where to start a kit takes the guesswork out of shopping.
- Budget-conscious shoppers: who want everything at once without overspending.
- Gift buyers: nail art kits make amazing gifts for beauty lovers.
When choosing nail art supplies for beginners in kit form, look for kits that include at least one liner brush, a set of dotting tools, and some base accessories. Read reviews before buying quality varies a lot between brands.
How to Use Nail Art Tools at Home
Learning how to use nail art tools at home is easier than you think. Follow these steps every time you do your nails:
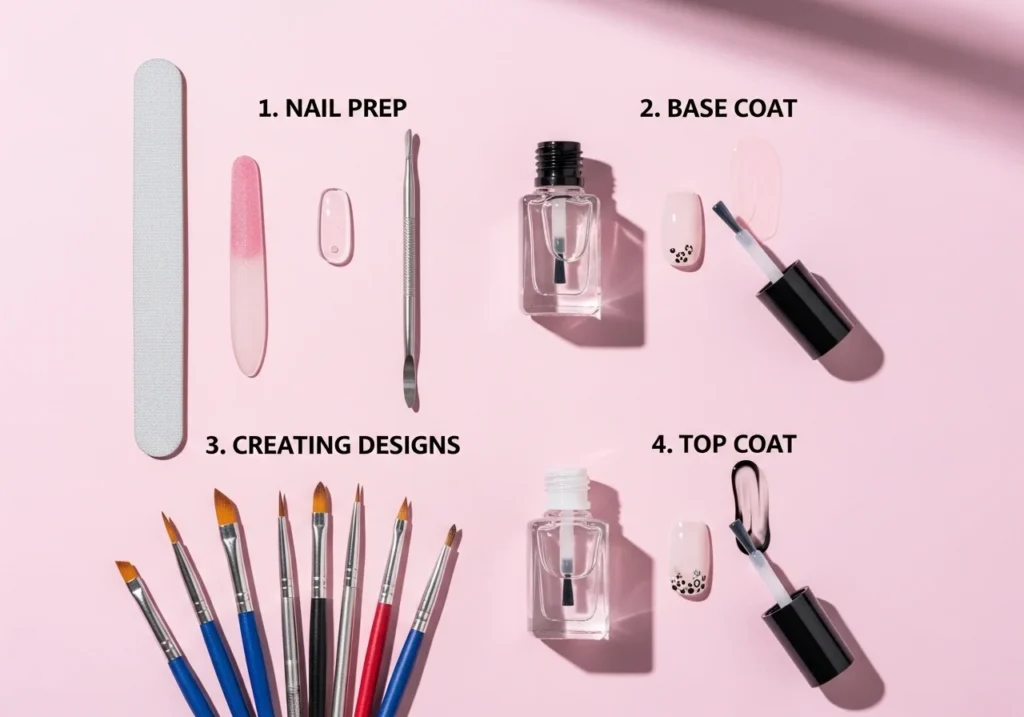
- Prep Your Nails File and buff your nails into your desired shape. Push back your cuticles gently. Clean nails = better results.
- Apply a Base Coat This step is non-negotiable. Let it dry completely before moving on.
- Apply Your Base Color Use 2 thin coats of your chosen nail polish. Let each coat dry before applying the next.
- Create Your Design Now’s the fun part! Use your brushes, dotting tools, or accessories to add your design. Work slowly and confidently.
- Fix Any Mistakes Dip a thin brush or cotton swab in nail polish remover and carefully clean up the edges.
- Seal with Top Coat Once your design is fully dry, apply a top coat to protect and seal everything in.
- Clean Your Tools Immediately wipe brushes with acetone or nail polish remover. Never let polish dry on your brushes.
The key to beautiful nail art at home is patience. Don’t rush the drying steps, and don’t be too hard on yourself if your first attempt isn’t perfect.
Pro Tips for Beginners
Here are some practical, honest tips that will save you a lot of frustration:
- Thin coats are everything. Thick polish takes forever to dry and smudges easily. Always apply thin, even coats.
- Practice on fake nails first. Nail tip rings or press-ons let you practice designs without the pressure of ruining your real manicure.
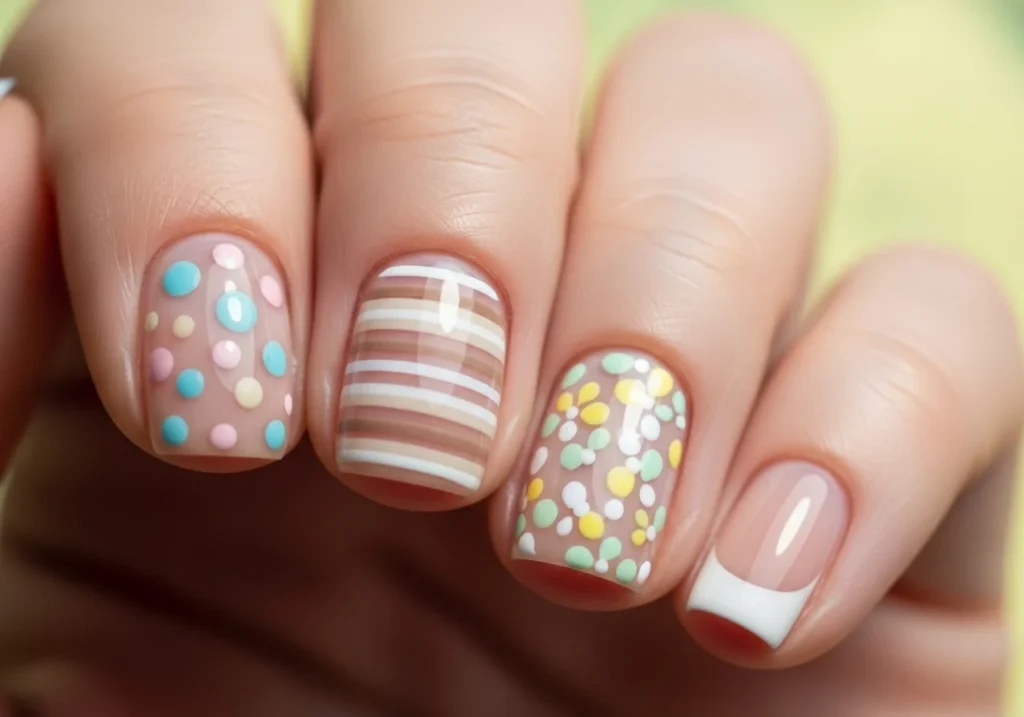
- Keep it simple to start. Master dots and lines before moving on to complex patterns. Simple nail art done well always looks better than messy intricate art.
- Use a light box or good lighting. You’ll be amazed how much better your designs look — and how much easier they are with proper lighting.
- Don’t skip the top coat. It’s the difference between nail art that lasts 2 days and nail art that lasts 10 days.
- Always clean your brushes immediately. Dried polish ruins brushes fast. Wipe them clean with acetone right after each use.
- Watch tutorials. YouTube and Instagram are packed with free nail art tutorials. Watching someone else do it first makes the process so much easier to understand.
Conclusion
Nail art is one of the most fun, affordable, and creative ways to express yourself and it’s totally something you can learn at home. The secret isn’t talent. It’s having the right nail art tools and a little bit of patience.
Start with the basics: a few nail art brushes, a set of dotting tools, and some nail art accessories. Once you’re comfortable, explore nail art kits and level up your collection.
Remember every nail artist you admire was once a beginner who didn’t know where to start. Now they’re creating stunning art on tiny canvases. You can too. So go ahead grab those tools, pick your favorite colors, and start creating. Your most beautiful nails are just a brush stroke away!

Frequently Asked Questions (FAQs)
What tools are needed for nail art?
The basic nail art tools list for beginners includes nail art brushes (liner, flat, detail), dotting tools, nail files, base coat, nail polish, top coat, and a cleanup brush. These are enough to create most beginner-friendly designs at home.
What is the best nail art brush for beginners?
The best nail art brush for total beginners is a detail brush paired with a liner brush. These two brushes cover the widest range of designs. As you improve, add a nail art brush for french tips and a flat brush to your collection.
Can I do nail art at home without professional tools?
Yes, but it will be much harder. Professional nail art tools are designed for precision and control. However, you don’t need to spend a lot budget-friendly nail art kits give you good results without the professional price tag.
How do I clean nail art brushes?
Clean your nail art brushes immediately after use by wiping them on a paper towel, then dipping the bristles in acetone or nail polish remover. Reshape the bristles with your fingers and lay the brush flat to dry. Never stand brushes upright in liquid it damages the glue holding the bristles.
Are nail art kits worth buying for beginners?
Absolutely. A beginner nail art set gives you multiple tools at a lower combined price than buying each item separately. Look for kits that include at least brushes and dotting tools. They’re also great starter gifts for anyone who loves beauty.