Lace Nail Designs: Chic, Elegant & Trendy Ideas
Written by Emma ·
If there’s one nail trend that never goes out of style, it’s lace nails. Delicate, intricate, and undeniably feminine, lace nail art brings the elegance of real lace fabric straight to your fingertips. Whether you’re getting ready for a wedding, a special event, or simply want to elevate your everyday look, lace designs offer a level of sophistication that few other nail art styles can match.
What makes lace nails so appealing is their versatility. They can be bold and dramatic in black, soft and romantic in white, or subtle and understated in nude depending entirely on your mood and occasion. Even beginners can achieve beautiful results with the right tools and a little patience.
In this guide, you’ll discover the most popular lace nail designs, the tools you need, a beginner-friendly step-by-step tutorial, and expert tips to help you nail the look every single time. Whether you’re a nail art newcomer or a seasoned enthusiast, there’s a lace design here that’s perfect for you.
What Are Lace Nails?
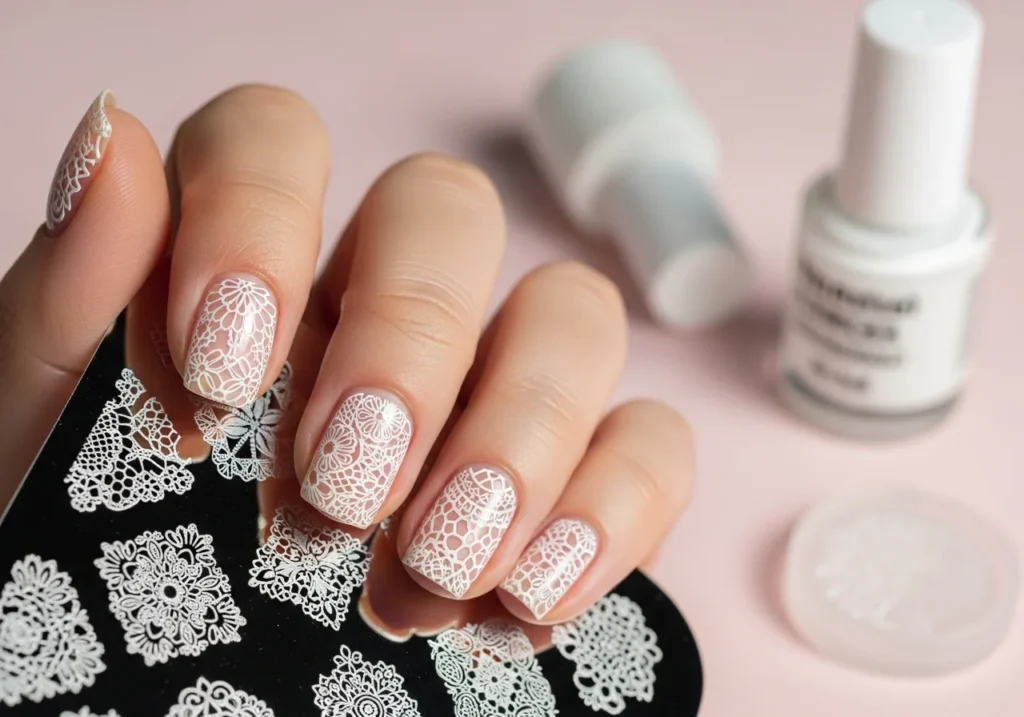
Lace nails are a style of nail art that mimics the intricate, web-like patterns found in lace fabric. Think delicate florals, fine mesh, scalloped edges, and flowing botanical details all recreated on your nails using polish, stamping plates, nail stickers, or fine-tipped brushes.
Why is this trend so popular?
Lace nail art sits at the intersection of classic and contemporary. It draws from a timeless textile tradition while adapting beautifully to modern nail aesthetics. The result is a look that feels both refined and creative something that works equally well at a formal event or as an everyday statement.
Different styles to explore:
- Minimal lace a single lace accent nail on a clean neutral base
- Bold lace full lace coverage across all nails in a high-contrast color
- Bridal lace delicate white or ivory designs with floral detailing
- Modern lace lace elements combined with geometric or negative space designs
The beauty of lace nail designs is that they can be as simple or as complex as you want them to be.
Popular Lace Nail Designs
Black Lace Nails
Black lace nails are the ultimate combination of edgy and elegant. A fine black lace pattern over a white, nude, or deep red base creates a striking, high-contrast look that works beautifully for parties, date nights, or any occasion where you want to make a statement.
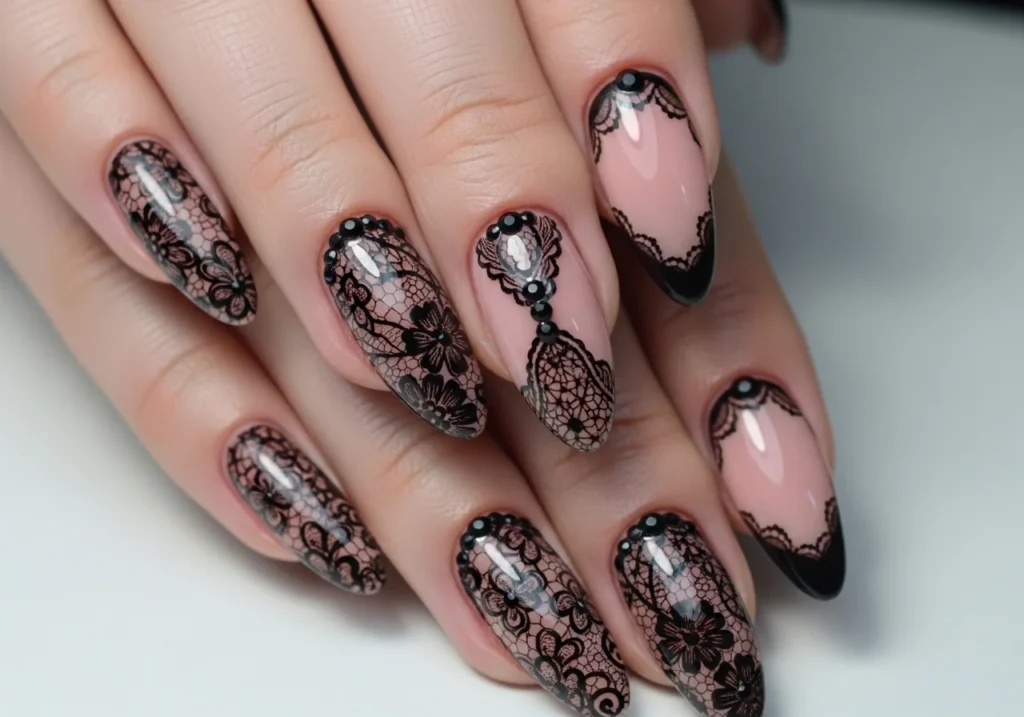
This style suits longer nail shapes almond, coffin, or stiletto where the intricate detailing has more space to shine. A glossy top coat adds depth and makes the pattern pop.
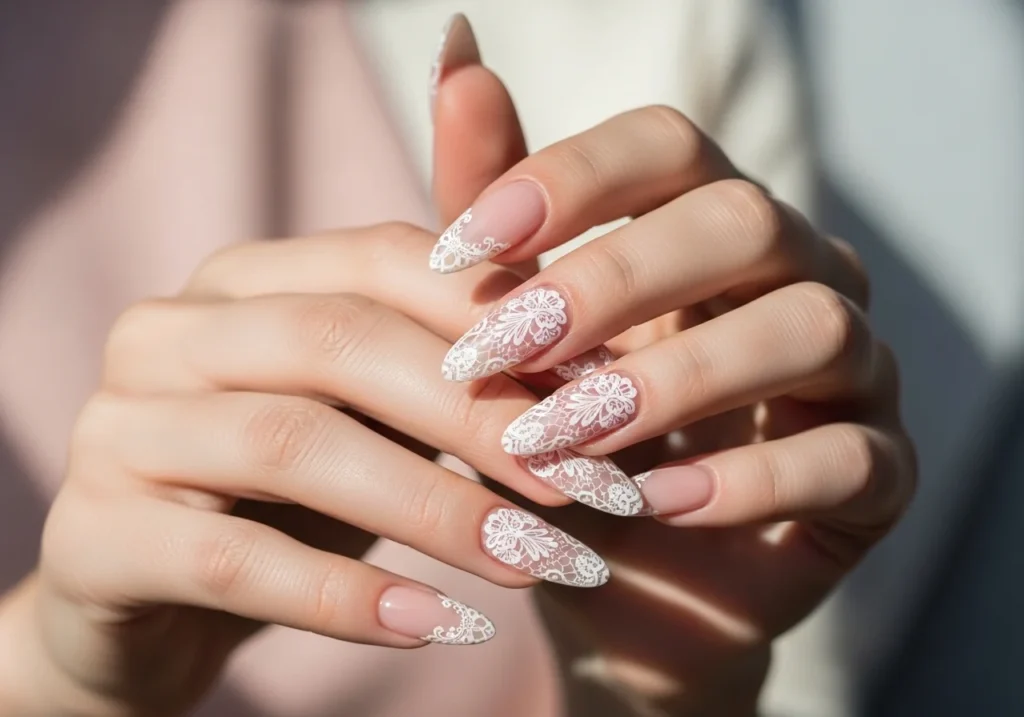
White Lace Nails
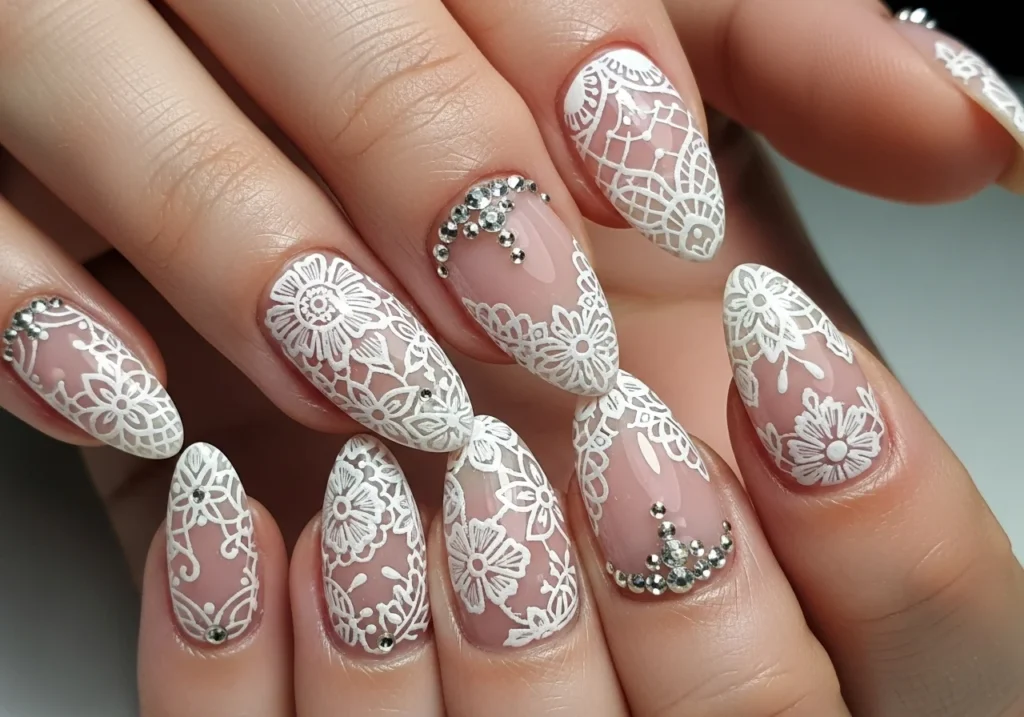
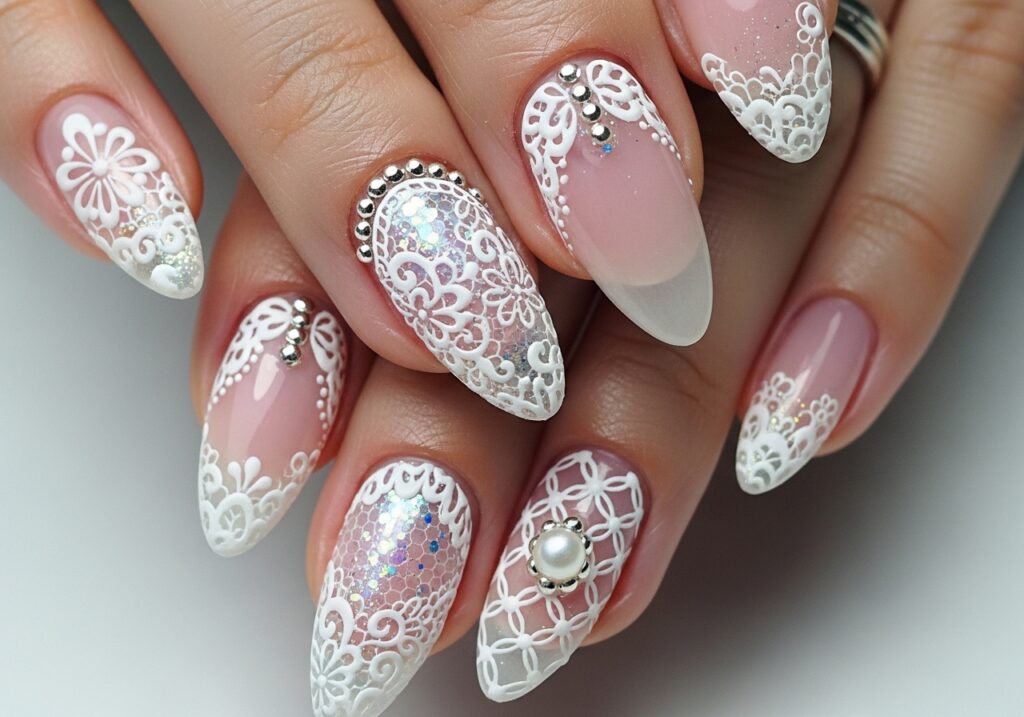
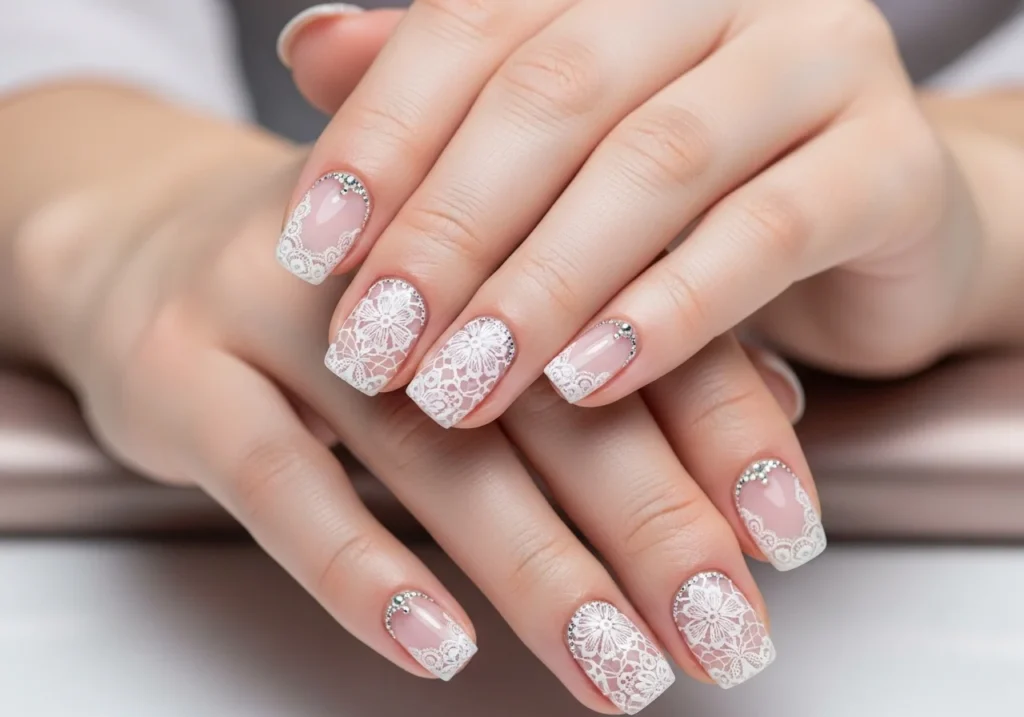
White lace nails are the definitive choice for brides and romantic occasions. Soft, delicate, and undeniably feminine, a white lace pattern over a pale blush or sheer nude base looks breathtakingly elegant.
This style pairs perfectly with wedding dresses, bridesmaid looks, and any occasion calling for refined, understated beauty. White lace on a natural nail base also works beautifully for everyday wear polished without being overpowering.
Nude Lace Nails
For those who prefer something more subtle, nude lace nails are the perfect choice. A fine lace pattern in a tone slightly darker or lighter than the base color creates a tonal, sophisticated effect.
This barely-there approach works beautifully in professional settings and is one of the most wearable lace styles for everyday life. It’s understated but unmistakably elegant.
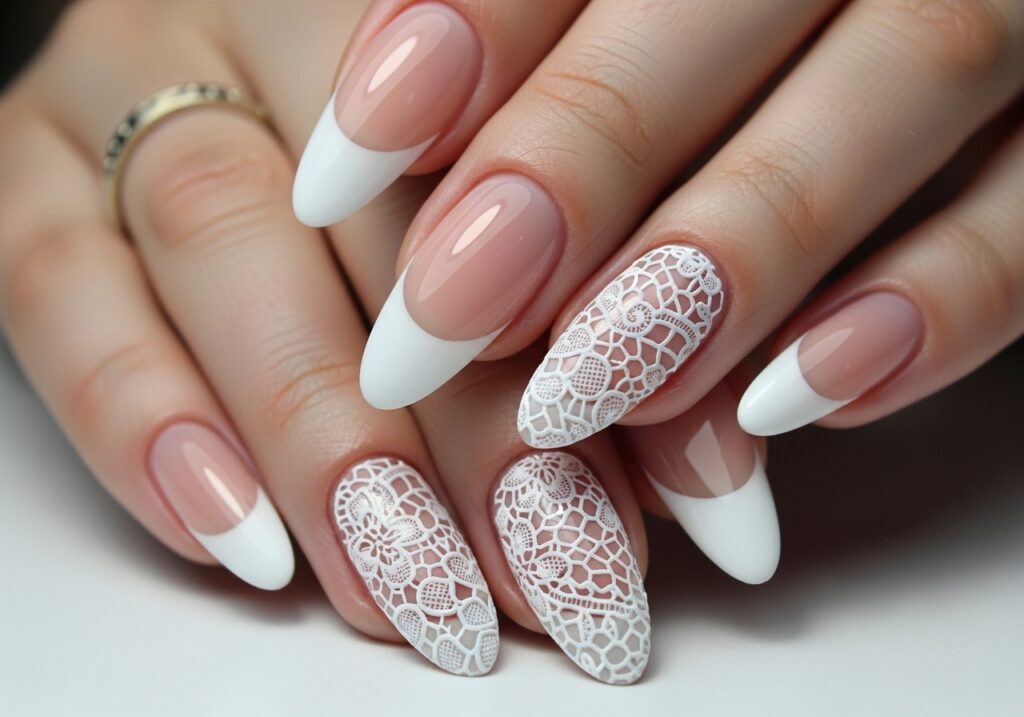
French Tip Lace Nails
A modern twist on a classic, French tip lace nails replace the traditional white tip with a delicate lace border. The result is a refined, contemporary look that updates a timeless style.
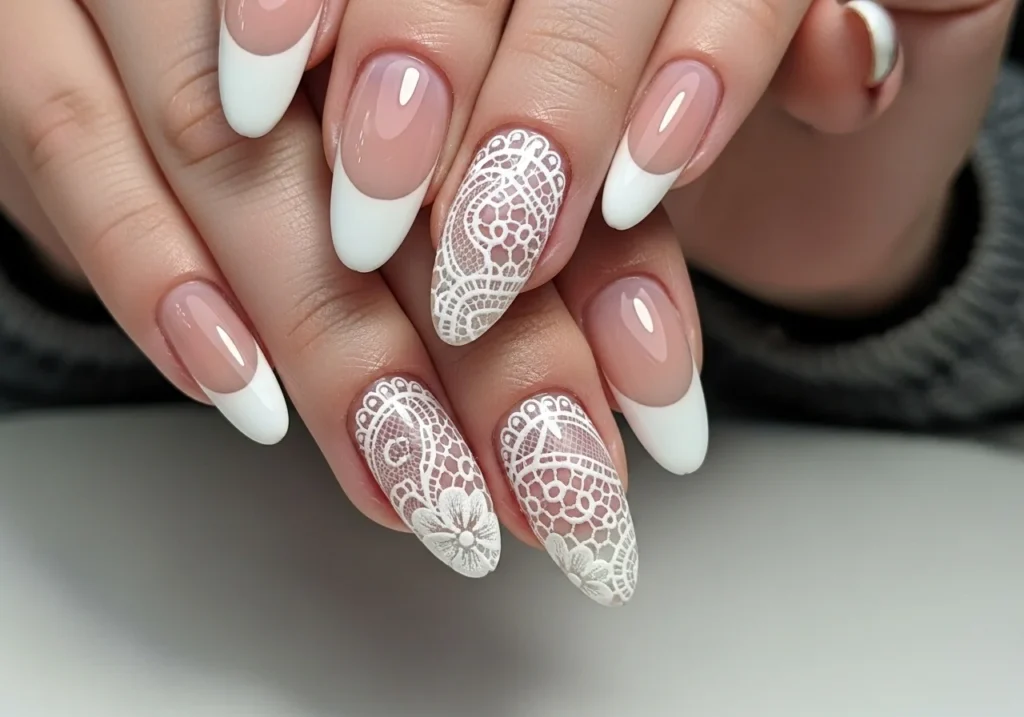
Try lace tips in white for a classic feel, black for a dramatic edge, or gold for a luxurious finish. This design works on nails of any length and suits virtually any occasion.
3D Lace Nail Art
For maximum impact, 3D lace nail art uses textured elements like lace appliqués, gel builds, or raised stamping to create designs that literally lift off the nail surface.
This is the most advanced style in this list and is typically best achieved at a salon, though experienced DIY nail artists can experiment with nail lace stickers or gel extensions at home. The result is genuinely stunning a true wearable art piece.
Lace Nails for Special Occasions
Bridal Lace Nails
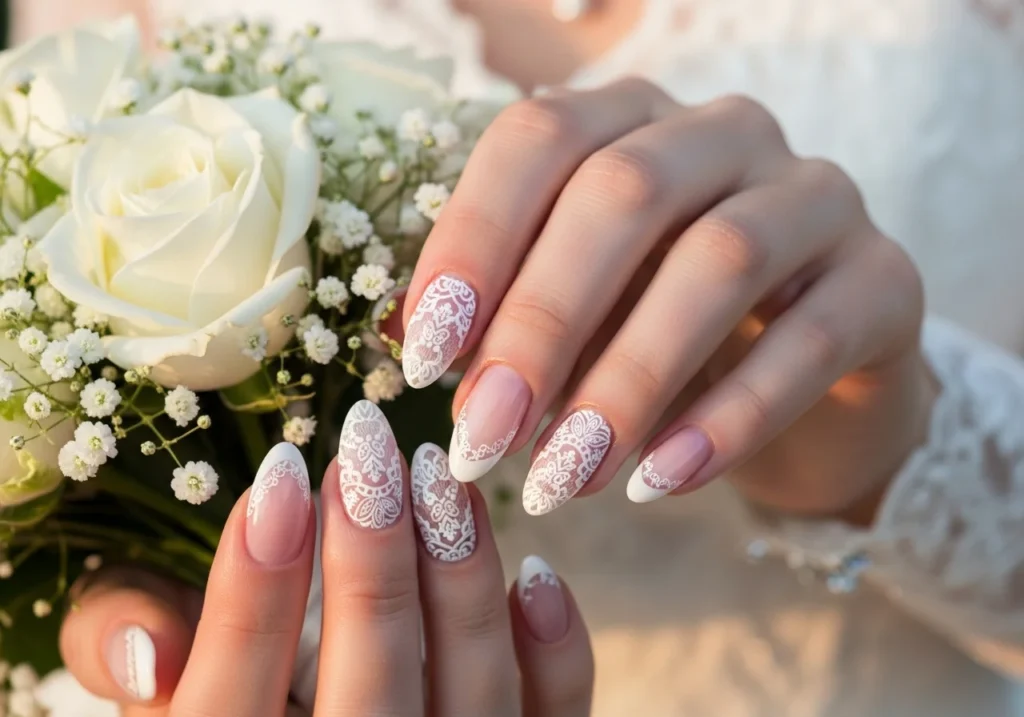
Bridal nails lace designs are among the most requested styles at nail salons worldwide and for good reason. On your wedding day, every detail matters, and lace nails tie beautifully into the fabric, florals, and romance of the occasion.
Classic choices include white or ivory lace on a sheer base, delicate floral lace accents on almond-shaped nails, or a single statement lace nail against simple, polished companions. If your dress features lace detailing, mirroring the pattern on your nails creates a cohesive, intentional bridal look.
Party and Event Nail Ideas
For parties and formal events, don’t be afraid to go bolder. Black lace on a deep burgundy base, metallic lace detailing on a nude ground, or colorful lace accents all translate beautifully under event lighting.
Elegant nail designs for events work best when they balance intricacy with wearability detailed enough to be noticed, refined enough to complement your outfit rather than compete with it.
Romantic Date Nail Designs
For a date night look, consider a blush or soft red base with delicate white or gold lace detailing. This combination reads as romantic, intentional, and effortlessly chic without being overly formal.
Tools and Products Needed
Before you begin, gather the right supplies. Having the correct tools makes a significant difference between a frustrating experience and a beautiful result.
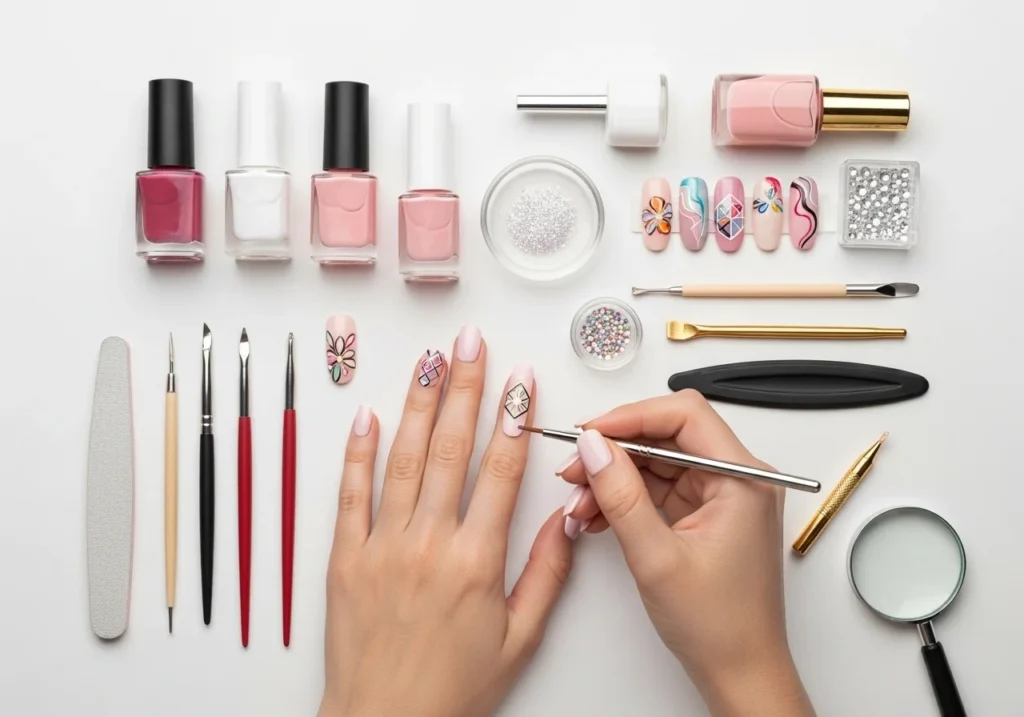
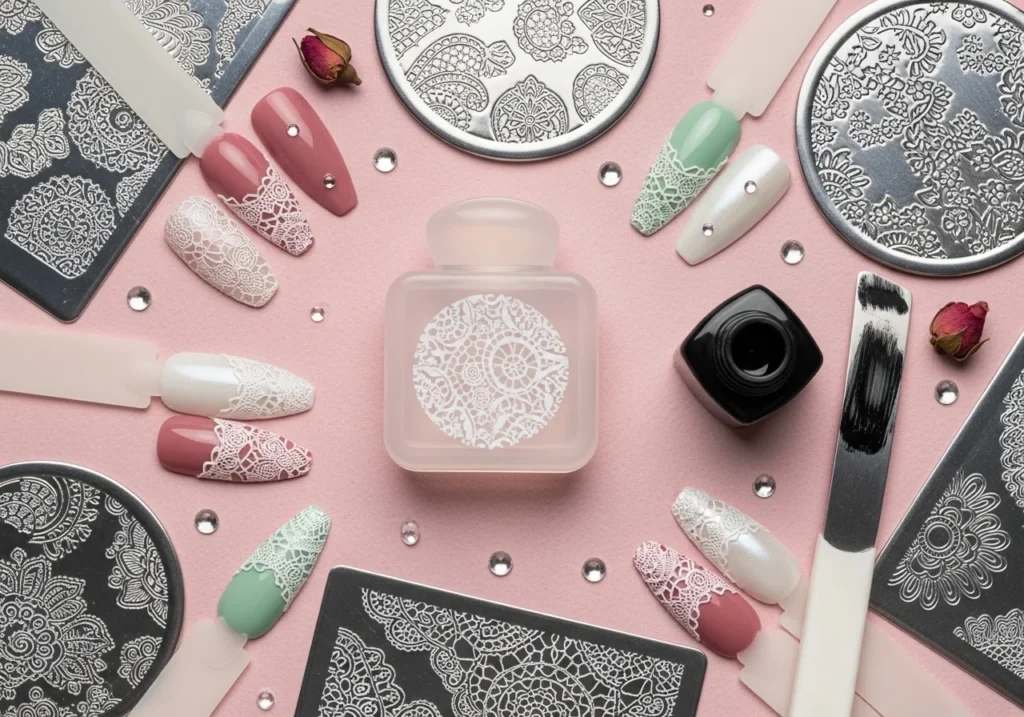
Essential tools for lace nail art:
- Base coat protects your natural nail and helps color adhere evenly
- Nail polish your chosen base color plus a contrasting lace color (usually white, black, or nude)
- Nail stamping plates metal plates with engraved lace patterns; one of the easiest ways to create consistent, intricate designs
- Stamping polish thicker than regular polish, designed to transfer clearly onto stamping plates
- Nail stamper and scraper used to pick up and transfer the stamped design
- Fine nail art brush for hand-drawn details or touching up edges
- Lace nail stickers or decals the most beginner-friendly option; peel and apply directly onto the nail
- Top coat seals and protects the design; essential for longevity
Optional but helpful:
- Nail tape for clean edges
- Dotting tools for accent details
- UV gel top coat for extra durability
How to Create Lace Nails at Home
This beginner-friendly guide walks you through creating lace nail art at home using stamping plates or stickers.
Step 1: Prep Your Nails Start with clean, dry nails. Remove any old polish, push back your cuticles, and shape your nails to your preferred length and style. Apply a thin, even layer of base coat and let it dry completely. This step protects your nails and helps your design last longer.
Step 2: Apply Your Base Color Apply one or two thin coats of your chosen base color. Allow each layer to dry fully before moving to the next. For lace nail art, solid, smooth coverage works best avoid glitter or heavily textured polishes as your base.
Step 3: Create the Lace Design
If using stamping: Apply stamping polish generously over your chosen lace plate pattern. Scrape off the excess at a single angle, then press your stamper firmly onto the plate and lift cleanly. Roll the stamper gently across your nail to transfer the design. Work quickly stamping polish dries fast.
If using stickers or decals: Peel your lace sticker carefully and position it on the nail while your base color is slightly tacky. Smooth it down gently from the center outward to avoid air bubbles.
If hand-painting: Load a fine nail art brush with your lace color and paint thin, curved lines to mimic lace patterns. Floral loops, mesh crosshatching, and scalloped borders are all achievable with patience and practice.
Step 4: Add Details Once the main design is in place, use a fine brush to add finishing touches fill in any gaps, clean up edges, or add small dot accents. Small imperfections add character, so don’t aim for machine-level perfection.
Step 5: Seal With Top Coat Apply a generous, even layer of top coat over the entire nail, including the edges. This locks in your design, adds shine, and dramatically extends wear time. Allow to dry completely resist the urge to rush this step.
Tips for Perfect Lace Nail Art
These practical tips will help you get better results every time you try lace nail art ideas.
Use thin brushes for details A fine nail art brush gives you far more control than a regular polish brush. Invest in a good set they make a noticeable difference.
Practice on paper first Before applying a stamped design to your nail, practice transferring it onto paper. This helps you get the pressure and timing right without wasting product or ruining a freshly painted nail.
Choose contrasting colors The most striking lace designs use colors with clear contrast white on black, black on nude, gold on white. High contrast makes the lace pattern readable and visually impactful.
Keep designs balanced If you opt for a bold, full-coverage lace design on accent nails, balance the look with simple, clean nails on the remaining fingers. Not every nail needs to be detailed.
Use a high-quality top coat A good top coat is non-negotiable. It protects your design from chipping, smooths out any texture from stickers or stamping, and gives your nails a professional, salon-like finish.
Common Mistakes to Avoid
Even experienced nail artists make mistakes. Here’s what to watch out for when creating trendy nail designs with lace patterns.
Overcomplicating the design More detail doesn’t always mean a better result. A simple, well-executed lace pattern looks far more elegant than a cluttered, overly busy design. Start with one or two accent nails before committing to a full set.
Using thick or old polish Thick polish bubbles, streaks, and never dries properly. If your polish has thickened in the bottle, add a drop of nail polish thinner (not remover) or replace it altogether. Fresh, fluid polish gives you much cleaner results.
Skipping the top coat This is the most common mistake beginners make and the most costly. Without a top coat, even the most beautiful lace design will chip within days. Always seal your work.
Not letting layers dry Patience is the most underrated tool in nail art. Rushing between layers causes smudging, bubbling, and uneven results. Allow each coat base, color, design, and top coat to dry fully before moving on.
Conclusion
Lace nails are one of those rare nail art styles that manage to be simultaneously timeless and on-trend. They work for weddings and formal events, date nights and everyday wear, beginners and professionals. The variety of styles from bold black lace to delicate bridal white means there’s a version of this look for every personality and occasion.
The best part? With the right tools and a little practice, you can create stunning lace nail art entirely at home. Start simple with a lace sticker on an accent nail, then gradually work up to stamping and hand-painted designs as your confidence grows.
Lace nails are not just a trend they’re a statement. And that statement is timeless.
FAQs
Are lace nails good for beginners?
Yes especially when using lace nail stickers or decals, which require no artistic skill. Simply apply them over a dry base color and seal with top coat. Stamping plates are also beginner-friendly with a little practice and are far easier than hand-painting.
How long do lace nails last?
With proper application and a good top coat, lace nails typically last seven to ten days. Gel top coats extend this to two weeks or more. Reapplying top coat every two to three days helps maintain the design and prevent chipping.
Can I do lace nail art without tools?
Yes. Lace nail stickers and decals require no special tools beyond a base color and top coat. They’re the most accessible entry point for anyone wanting to try this style without investing in stamping equipment or brushes.
What colors work best for lace nails?
High-contrast combinations work best white lace on black, black lace on nude or white, gold lace on deep burgundy. For a softer, more everyday look, tonal combinations (ivory lace on blush, or nude lace on a slightly darker nude) create a subtle, sophisticated effect.
Are lace nails suitable for weddings?
Absolutely. Bridal nails lace designs are one of the most popular choices for brides and wedding parties. White or ivory lace on a sheer or blush base is a classic bridal choice that complements virtually any wedding aesthetic, from traditional to modern.
Related Articles
Explore more topics in this category

12 Easy Halloween Nail Ideas To Try This Spooky Season
Halloween nail ideas have grown into one of the most fun ways to get into the season without much commitment. Easy designs work just as well for beginners as they do for anyone who’s been doing their own nails for years. I tried my first Halloween nail art two years ago with nothing but a…
15 Coffin Nails Ideas You’ll Want to Try This Year
Coffin nails have become one of the most requested shapes at nail salons over the past few years. The tapered sides and flat, squared-off tip give nails a long, elegant look without feeling overly dramatic. I switched to this shape last year for a wedding and ended up keeping it for months afterward. This guide…
Wedding Nail Ideas That Last Through Your Big Day
The week before my cousin’s wedding, I sat in a nail salon chair watching the technician buff off what I thought was going to be my perfect bridal look. I’d gone in with a pinterest board full of intricate 3D floral designs, tiny pearls, and gradient ombre across all ten nails. An hour later, I…

Emma
Hey there! Welcome to my blog. I love sharing practical tips, hidden secrets, and awesome hacks to help you live beautifully and smart. Stay tuned for more exciting updates!
Read More About Emma →